If you’ve been working with videos for a while, or have just started, I’m sure you know how big video files can get.
Compressing the videos is the right thing to do if you have issues with poor internet or you like managing your data.
Today, I’ll be showing you how to reduce the size of large videos using your Android device without losing quality. I’ve had great results so far.
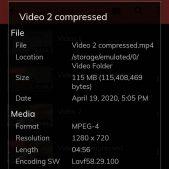
I compressed a 306MB video to about 35MB and a 900MB video to about 115MB with my Android phone.
If this sounds like what you’re aiming to achieve with your videos, then let’s begin.
Below is a video you can watch. But don’t worry, I’ll show you a step by step way of doing it that will be easy for you to understand even without watching the video. So let’s begin.
COMPRESSING VIDEOS ON ANDROID
To compress videos with your Android phone, you can find a lot of apps on the Play Store to achieve this. After testing out a lot of them, the app I’m recommending is FFmpeg Media Encoder.
We’ll talk about the app a little bit later. For now, just know that it’s a free app. So, let’s talk about compressing videos with it now.
In the image below, you can see that I have 2 videos. The videos are stored on my phone’s internal memory and in a folder named “Video Folder”. You can also see their sizes.
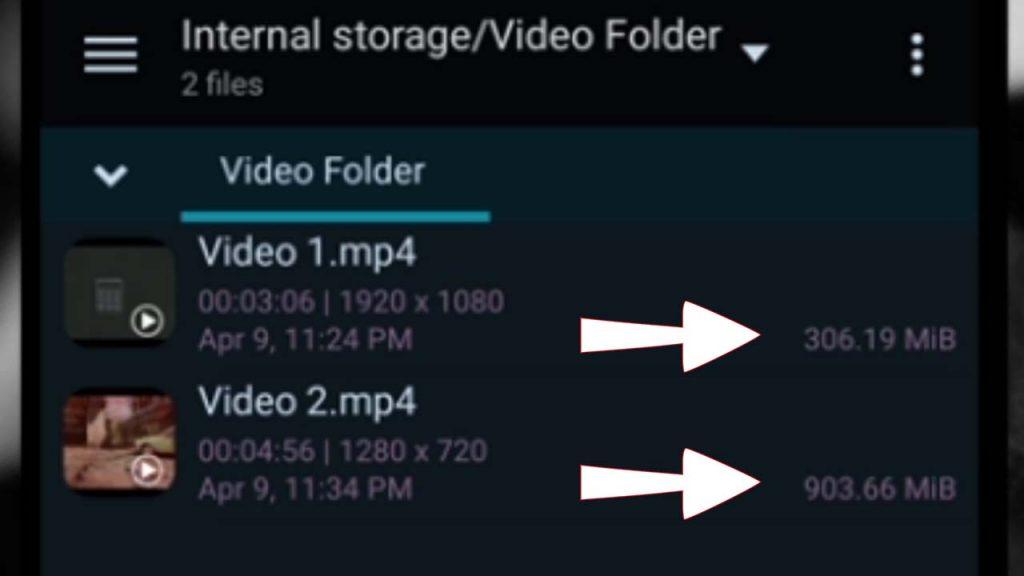
So, know where the videos you want to compress are so you don’t get confused while looking for them lol.
Now, to start compressing, you have to download the app from the Play Store, so click here to do that. Remember, the app is completely free.
After downloading, give the app the permission to see the files on your phone by tapping Allow.

Now you may be seeing a lot of options that look overwhelming, worry not. You only need to change one thing and you’ll be on your way to compressing videos.
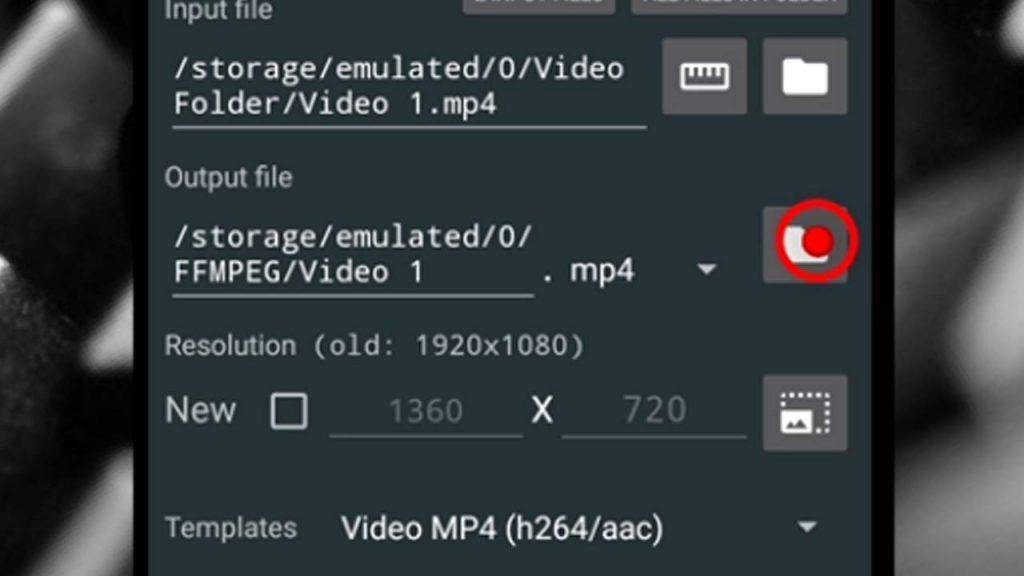
You want to look for the “Templates” section, it’s close to the bottom. Tap the dropdown menu next to it.
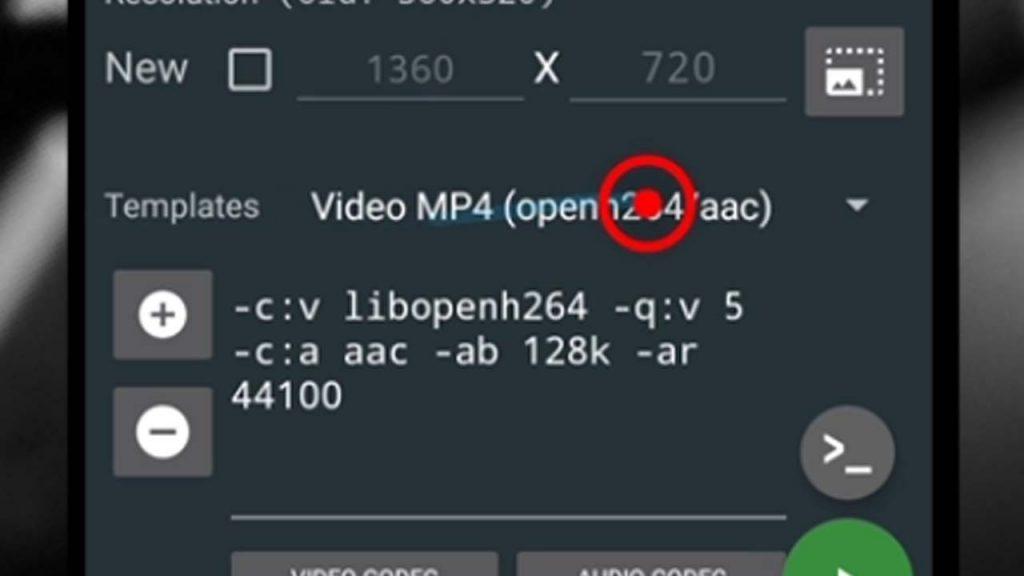
A list of options will be shown to you, what you should select is Video MP4 (h264/aac). This is the option that has worked well so far for me.

After you do that, it’s time to start selecting the videos you wish to compress.
At the right side of the app, you’ll notice 2 folder icons. The first icon is what you should tap to look for the videos you wish to compress.
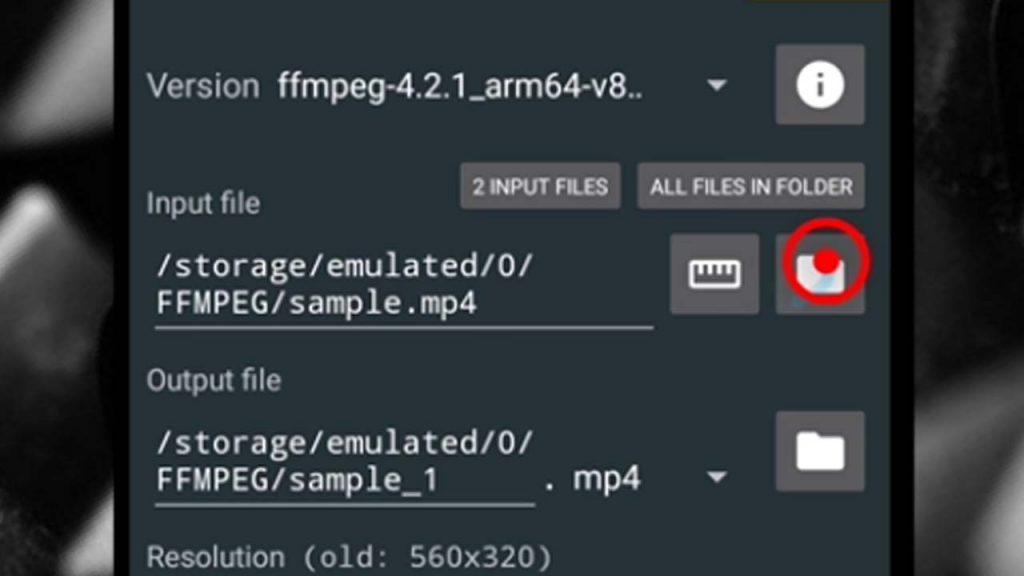
When you tap it, the app is going to allow you to browse your phone to the location where the video is.
You should tap the video you want to compress when you see it. You can only select one video, but don’t worry, I’ll show you how to compress more than one video in a session.
So, after you select the video you wish to compress, it’s time to tap the second folder icon, this will allow you select where you want the compressed video to be saved.
You can save it in the same folder where the original video is, but you’ll have to rename the video.
If you save it somewhere else, you won’t have to rename the video.
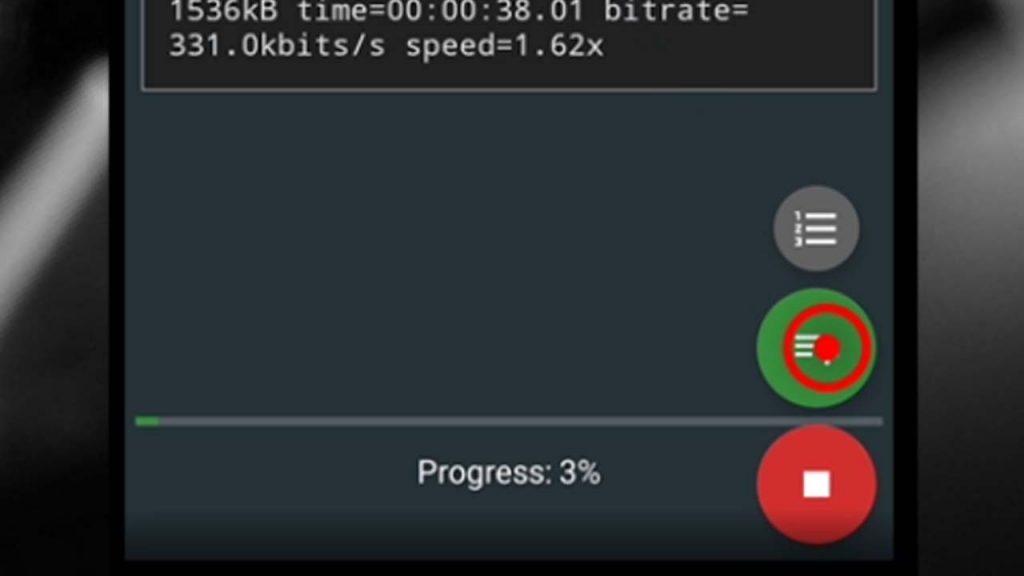
After you’re done selecting the video you wish to compress and where you want to save it, tap the green button at the bottom right to begin.

The app is going to take some time depending on the size of the video to compress and when it’s done, you’re going to hear a “ding” sound.
With the images below, you’ll see that the videos I compressed which were 300MB and 900MB approximately, are now 30MB and 115MB.

You can watch the video at the top for a side by side comparison of how both original and compressed videos look.
FFMPEG MEDIA ENCODER: WHAT YOU NEED TO KNOW
Here are a few things I think you should know about the FFmpeg Media Encoder app as you use it to compress your videos from time to time.
IT IS A FREE APP
FFmpeg is a free to download app, however you will see ads if you use the app when you have an internet connection.
There’s a donate button, although I haven’t tried it yet, I believe it will get rid of the ads.
IT CAN BE USED OFFLINE
One of the good things about this app is that you can use it without an internet connection. Also, this way you won’t have to see ads showing up.
But seriously, for a free app, letting ads show up from time to time isn’t that bad.
YOU CAN QUEUE VIDEOS TO COMPRESS
This is what I promised to talk about earlier. Even though I talked about it in the video above, I didn’t show how to do it.
So here we go.
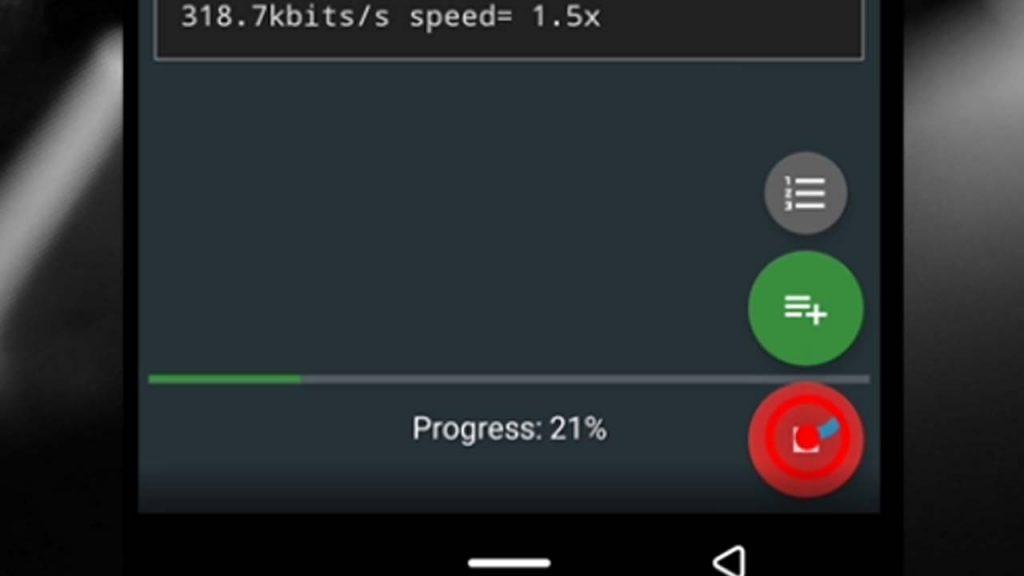
After you have selected and started compressing a video, you will see 3 buttons at the bottom right. You want to tap on the green one.
This will take you back to the part where you get to choose the video you wish to compress and where you want to save it (remember when we talked about folder icons?)
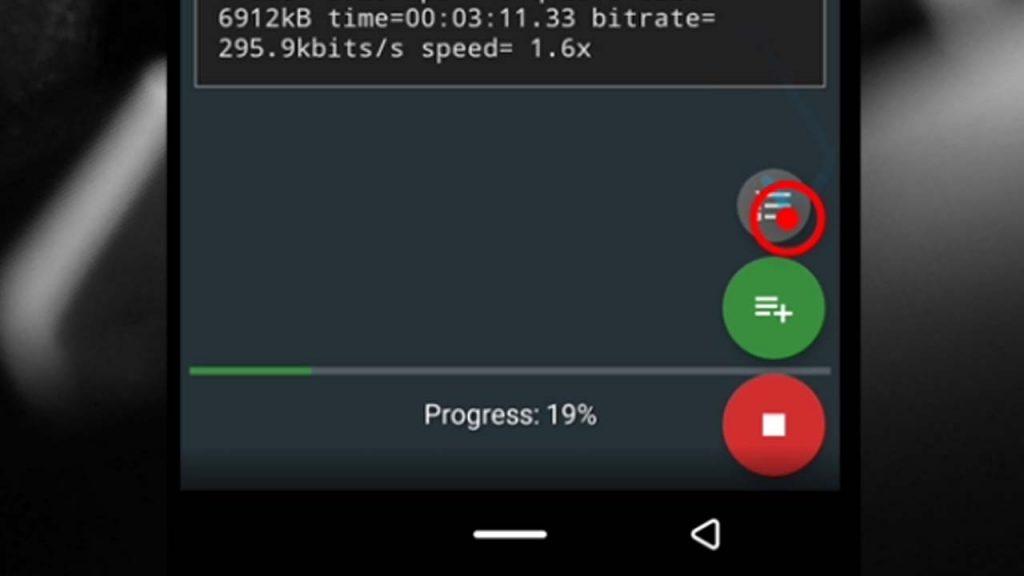
Well, when you get the other video you want to compress, tap the green button you see again.

You can repeat the process depending on the number of videos you want to compress, for me I only added 1 more video. Which makes it 2 videos to be compressed.

To see all the videos, you’re compressing, tap the little grey button at the bottom.
You can decide to delete the ones you don’t need to compress from there, if you want.
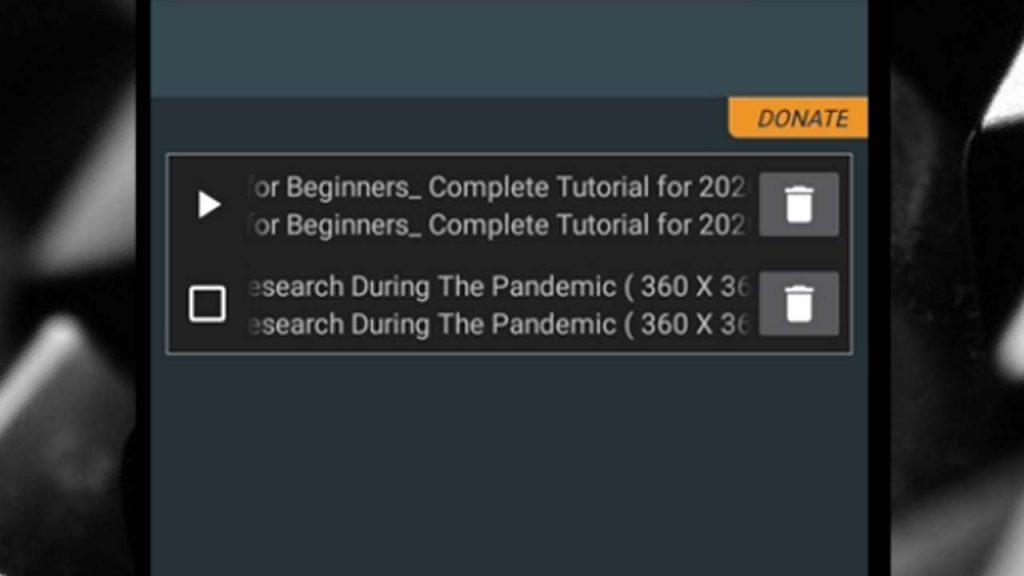
Or just tap the red button at the bottom to stop compressing all the videos.
COMPRESSION SLOWS DOWN WHEN THE PHONE SLEEPS
From my experience, if you want to compress videos fast, then your phone shouldn’t sleep. In other words, you shouldn’t allow the screen of the phone to turn off.
Now, it may be stressful to constantly tap the phone so it doesn’t sleep, but the app has a feature that will stop the phone from sleeping while compressing.
Here’s how you can do it.
Before you start compressing, tap the options icon at the top right of the app and select Settings.

Next, tap the check box that asks you if you want to keep your screen turned on when you encode.
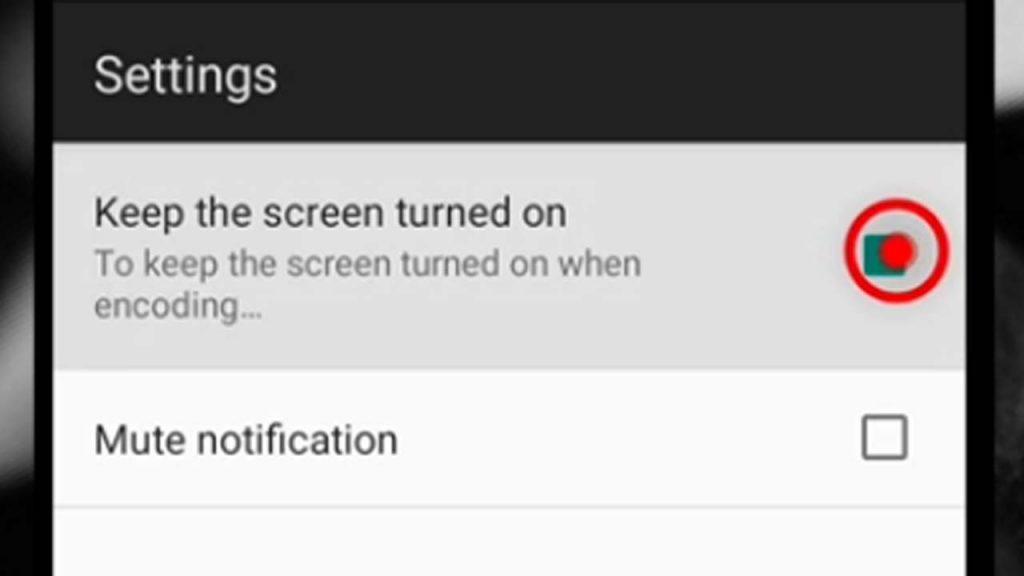

After checking the box, you can start compressing your videos, your phone’s screen won’t turn off anymore and your videos will compress faster.
FFMPEG IS NOT BATTERY FRIENDLY.
I know I said this app can compress a lot of videos for you, but please note that this app is a battery killer.
I lost 20% of my battery after compressing 2 videos.
I only use this app when I have a lot of videos to compress on my computer, so I just try to speed things up.
If you’re running low on battery or don’t have your charger around, go easy on how many videos you compress.
CAN CAUSE YOUR PHONE TO GET WARM… OR HOT
After compressing 2 videos with FFmpeg Media Encoder, I can tell you that I really didn’t feel comfortable using my phone.
It got hot.
Probably one of the reasons why battery runs down a lot.
Although phones can handle getting warm, you shouldn’t let that happen for too long. So after compressing 2 or 3 videos, let the phone rest for a while.
PHONE MIGHT GET LAGGY
In all honesty, I didn’t want to include this in the list, this is because if you have a recent phone with a really good processor you won’t experience this.
But for those of you who have phones that are normally laggy, with this app, it will be a whole lot more laggy.
So make sure you only allow the app to do its thing. Don’t use it alongside other apps if you want your phone to have “peace”.
CONCLUSION
Well, I hope this article has been able to help you compress videos using your Android phone?
One of the reasons I decided to make this article is because most of the apps people talk about compress videos by reducing resolution.
Which means your 4K videos may have to become 1080p videos, or lower.
This will drastically reduce the quality of the video.
But with the method I have talked about, your videos will remain the same in terms of resolution. Your 4K video will remain 4K and your 720p or 1080p videos will remain the same.
You can reduce the resolution of your videos using the app, but I don’t think I’ll be talking about it now.
It’s amazing how our phones are now able to do things we could only do with computers before. I’m getting a little feeling that you’re reading this article on your phone as well.
If you’re interested in learning more tips and tricks, click here to access all my tutorials.
All questions you may have will be answered as fast as possible. Just ask them using the comment box. Until next time, keep compressing, keep keeping quality, keep staying awesome.
My name is Shaibu and this is Shu’s Techs.