This Gmail tutorial will cover a lot of things you can do with the popular Email App. I try to make my tutorials very easy so even beginners can understand.
I’ll provide videos for each tutorial, but don’t worry, if you can’t watch videos for some reason, I’ll also put up pictures for you.
Well, let’s not waste any more time. The first thing we are going to talk about is how to view archived messages on the Gmail app.
How to Find Archived Emails on Gmail
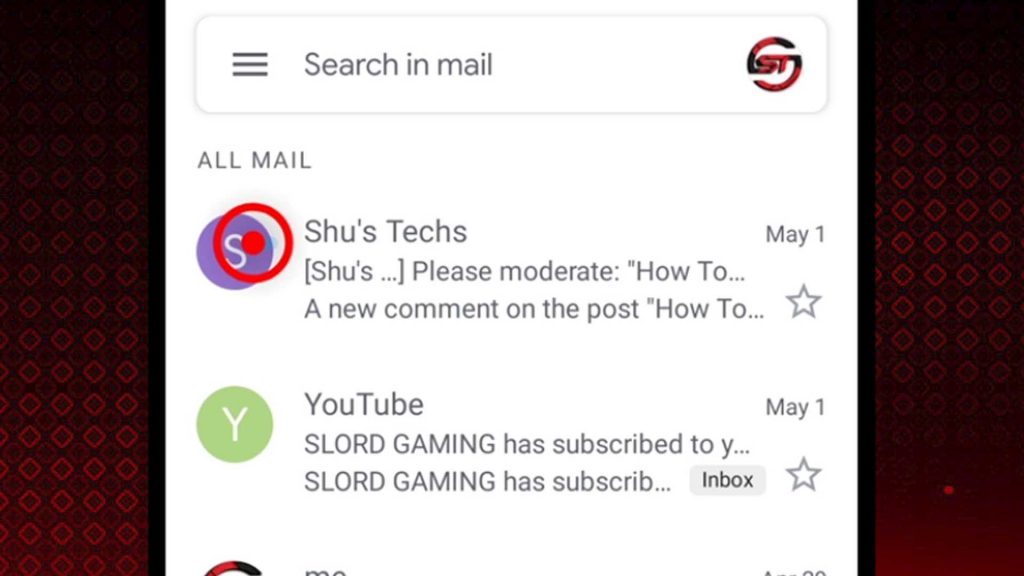
If you accidently archived an email, and want to get it back, well it’s fairly easy to find it. What you want to do is check your labels by tapping the horizontal bars at the top left.

When you do that, scroll down a bit till you find “All Mail”. Tap that again and you’ll see a list of all your emails.

You’re going to see both archived and unarchived emails, so don’t get confused thinking you accidentally archived all your emails.
Alright, now that we aren’t confused about why all our emails are showing up in the “archived folder”, it’s time to go through the list and unarchive the messages that we want in our inbox.
For this tutorial, I purposely archived an email, and as you can see, I have selected the email (so just select the email you want to unarchive).
To select it, just tap the picture of the sender you see on the left side. Sometimes it’s just an alphabet, not a picture.
When you tap it, you’ll get a “checked” mark.

Now that the email(s) you’re interested in unarchiving are selected, you need to tap the options button that you’ll find on the top right and then tap “move to inbox” and that is all.


You won’t notice the messages you selected disappearing, this is because you’re still in the “All Mail” section.
Remember when I said both archived and unarchived emails are always there? Well, there you go.
Now you can head back to your inbox by tapping the horizontal bars at the top left again to see your labels, and then going through either Primary, Socials or Promotions to check for the email.
You’re probably going to see it in the Primary section, so start there.
Labels are like sections where emails get assigned to, editing them requires using a computer. Since we’re talking about using the app, I will be talking about editing Gmail labels sometime in the future.
How to Send an Attachment with Gmail App on Android
Before you can send an attachment via email, you’ll need to have 3 things. An internet connection, the email address of who you want to send the attachment to and finally, the attachment itself.
For the attachment, you need to know the name and where it is located on your phone.
Alright, well let’s begin.
So, when you open the Gmail app, you’ll have to tap the Plus button to start up a new email.

You’re going to be taken to a new part of the app where you can attach your file. But first you’re going to have to fill up some fields.
They are: From, To, Subject and Compose.

From: this is where you’re going to insert your email. In most cases, it will be automatically applied for you. Mine is blurred out but yours is going to be visible.
To: here you’ll insert the email address of who you want to send the attachment to. Example is shustechs@gmail.com. You’ll need to ask the person you’re to send the attachment to for their email address if you don’t know it.
Subject: the best way to explain this is the subject is a way of telling someone why they should read your email. In the video above, I used the example of newspapers, the headline is what makes you want to read the newspaper. Your subject is going to be the reason why the receiver reads your email.
Compose Email: well, here you want to write a comprehensive reason why you’re sending an email. You can look at the image below for my example. Or better still, watch the video above.
For this example, I am going to be attaching a CV template.
After filling out every field, the first button at the top right that looks like a paperclip is what you’ll need to tap, then tap attach file.

From this point, you want to be sure you know where the file is, knowing the name of the file is a plus if your phone has a search icon.

If you can find a search icon, just tap it and type the name of the file, wait for about 3 seconds and when the file shows up, just tap it.
If you don’t have a search icon, you’ll have to manually go through your files and folders until you find the file of interest.
Like I said, in this example, I’ll be sending a CV. So, I looked through my files until I found the CV (yours can be a picture, video, audio file, etc.)
Once found, just tap it and it will be automatically added to the email you’re composing.


You can add multiple files if you want. If you accidently add the wrong file, just tap the “X” icon on the file and it will be removed.

After you’re done with composing the email, just tap the Blue button you’ll find on the top right. It’s the one in the middle.

Depending on the size of the file, it might take a short time or a long time to send, so make sure you have a stable internet connection.
After the email is sent, the image you can see above will be gone.
That is all, your attached file is sent. If you’re having difficulties doing this, please watch the video above, or just ask questions in the comments.
How to Locate Attachments Downloaded with the Gmail App on Android
If you download any attachment or file with the Gmail app, you’re going to find it in your “Download” folder on your phone’s internal storage.
The video above shows you how to download an attachment, and where to find it if you wish to open it up later.
Here’s how you can do it if you can’t watch the video. First I’ll show you how to download an attachment, then how to look for it on your phone’s file manager.
When you receive an email with an attachment, you’re going to see an icon that has an arrow pointing down. That’s the download button. Just tap it and you’ll see a download progress on your notification.
When it’s done downloading, you can either open it from the Gmail app itself, or just use your phone’s file manager.
Some file managers look different from others but they all have the similar files and folders.
First open the app by tapping its icon, then tap internal storage.

Next scroll down a bit till you find “Download”, tap it to open it and you’ll find all the files you’ve downloaded with the Gmail app.


You may find other files there but it’s just because other apps use the folder as their download location. So as long as you know the file(s) you downloaded with the Gmail app, you’re going to find them there.
How to Connect Your Yahoo Account to Your Gmail App
Having your Yahoo account connected to your Gmail app is one of the good things about the Gmail app.
This way you won’t have to worry about freeing up space on your phone because instead of 2 email apps on your phone, you’ll only have one.
You’re about to learn a step by step method of connecting your Yahoo account to your Gmail app. You can watch the video above if you want, so here we go.
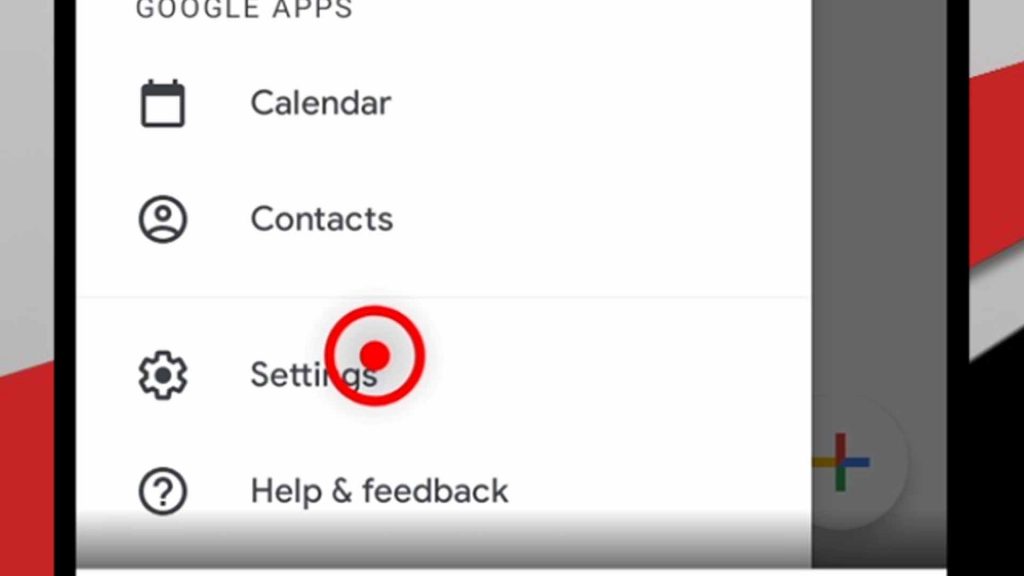
The first thing you want to do is tap the Menu icon at the top left. Scroll down till you find “Settings” and tap that too.
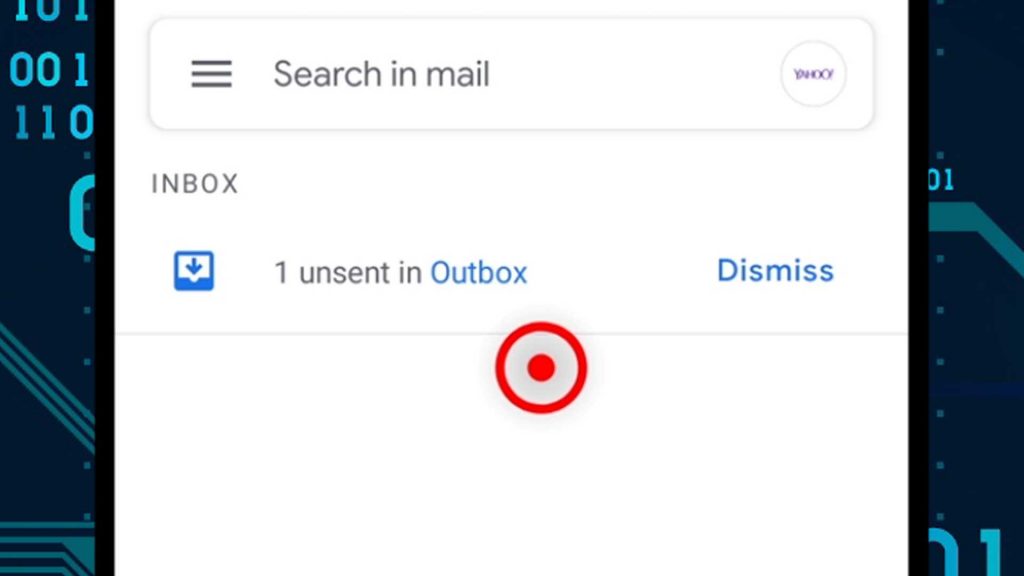
After tapping Settings, you will see a list of the account(s) you have connected to your Gmail app. Right below them is the “Add Account” button. Tap that.

You’ll see a list of Email platforms available to connect to, since we’re interested in Yahoo, that’s the one we’re going to select, so tap the Yahoo logo.

You may have to wait for a few seconds after tapping the logo, this depends on the speed of your internet connection.
Eventually, you’re going to get prompted to input an email address.
You want to input your Yahoo email address, not your Gmail and then tap next.

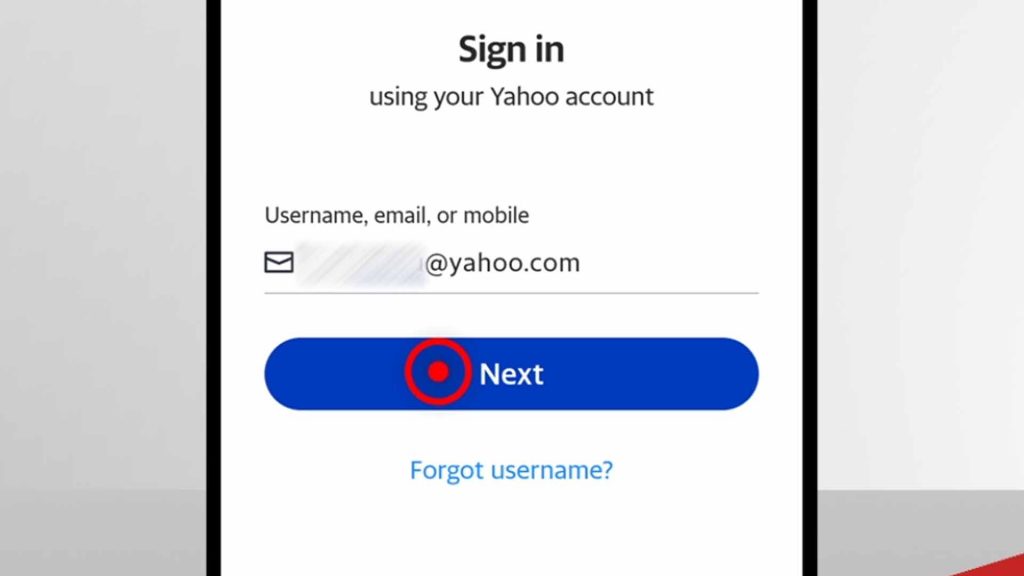
Next you’re going to input the password of your Yahoo email account. Hopefully, you remember it. When you do, tap next.
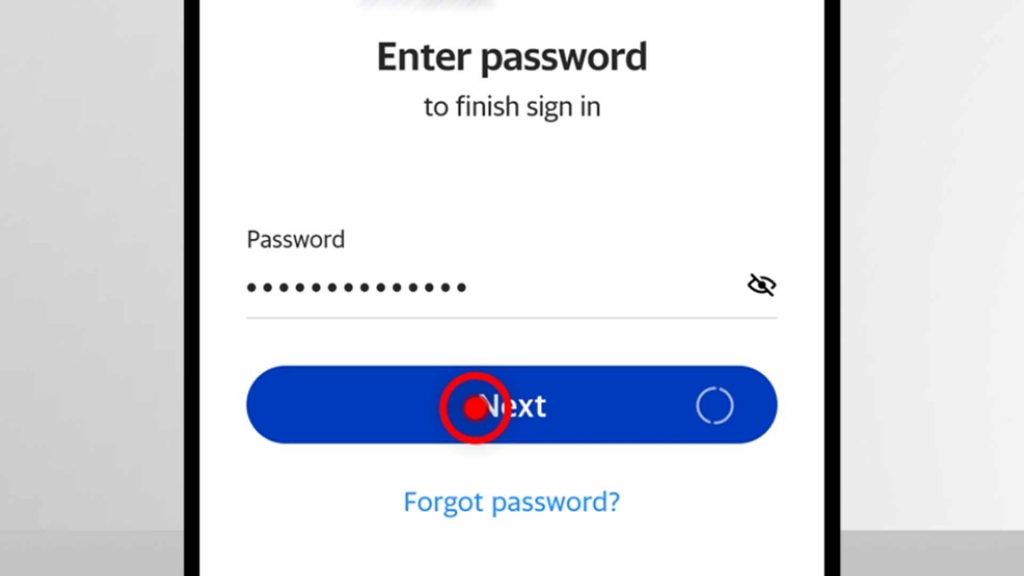
Now, you’re going to have to keep confirming requests. You only need to agree to what you want, I agreed to everything asked because I want the best features. I’ll suggest you do the same.
One of the options you’ll get is inputting your name, this is good if you want your email address “addressed” as your name.
For example, if your email is “email@yahoo.com” and your name is John, you’re going to be addressed as “John” whenever you have a notification.
If you don’t set your name, you’re going to be addressed as “email”.
Here’s how I set mine.

After you input your name, tap next and wait for a few more seconds for the platforms to sync up and as soon as it’s done, you’re going to see your Yahoo account among all your connected accounts.

Now, just because it is connected doesn’t mean it’s going to show you the emails. You’ll have to switch to the account first.
Don’t worry, it doesn’t take a lot of work, this is just there so you know which email account has which emails.
Well, to switch to your Yahoo account, head over to the main screen (you can close the Gmail app and open it again) and the tap the logo at the top right.
You’ll see all the accounts connected to the app, just choose the one you want to switch to by tapping it and you should see all the emails attached to it.
Mine is blurred out, but you can see the Yahoo logo on the left. You’re going to see yours too, just tap it.
How to Remove Accounts or Log Out from Gmail App
Officially, you can’t really “log out” of the Gmail app, but you have the option to remove the account connected to the app. This is going to remove everything else synced with the account so keep that in mind.
To remove an account connected to the Gmail app, just follow the steps below. I’ve included images so you can see each step. You can also watch the video above.
The first thing to do is to tap the options icon and then tap Settings.

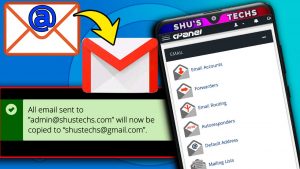
Next you should tap the email address you’re interested in removing from the list of email addresses shown to you. In this example, I chose shustechs@gmail.com, you can email me via that address anytime for questions or requests.

So after tapping it, tap the icon on the top right and then tap manage accounts.


A list of all your emails will be shown to you again, don’t worry, it’s going to be the last time.

Anyway, tap the email you want to remove again and this time, you’re going to see a “Remove Account” button at the bottom.
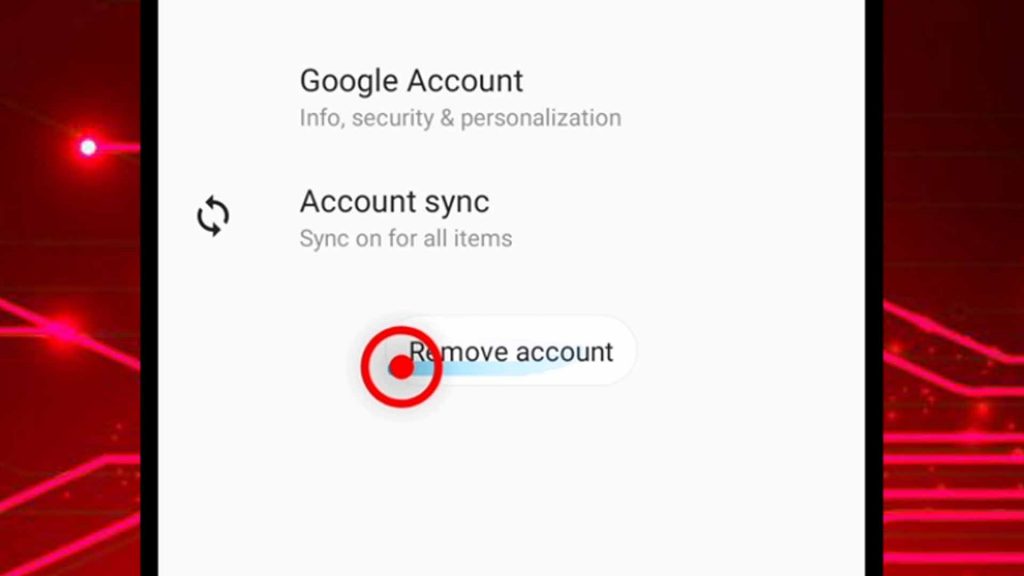
Tap it and then tap “OK”. That is all.
How to Block and Unblock an Email Address with Gmail App on Android
Blocking email addresses is handy when you don’t want to get notified of an email from a particular person or group you’re not interested in hearing from.
You’re going to receive the emails, but there are going to be in the spam folder.
The spam folder is a place where all unwanted and disturbing emails go. Google does a great job at filtering them so they don’t appear in your normal list of emails.
Anyways, to block an email from someone, just open up the email like you normally would, then tap the options icon close to the email address, it has three vertical dots.

Next, tap Block “the person’s email address”.


That is all.
When you go back to the main interface of the Gmail app, you’re still going to find the email there. You can delete it if you want but it’s probably there so you can easily access the email address again if you ever want to unblock it.
Future emails from the email address will go straight to your spam folder.
Now I’ll be showing you how to unblock emails, this time it will be emails you find in the spam folder.
First thing to do is tap the Menu icon on the top right and then scroll down till you find “Spam”.
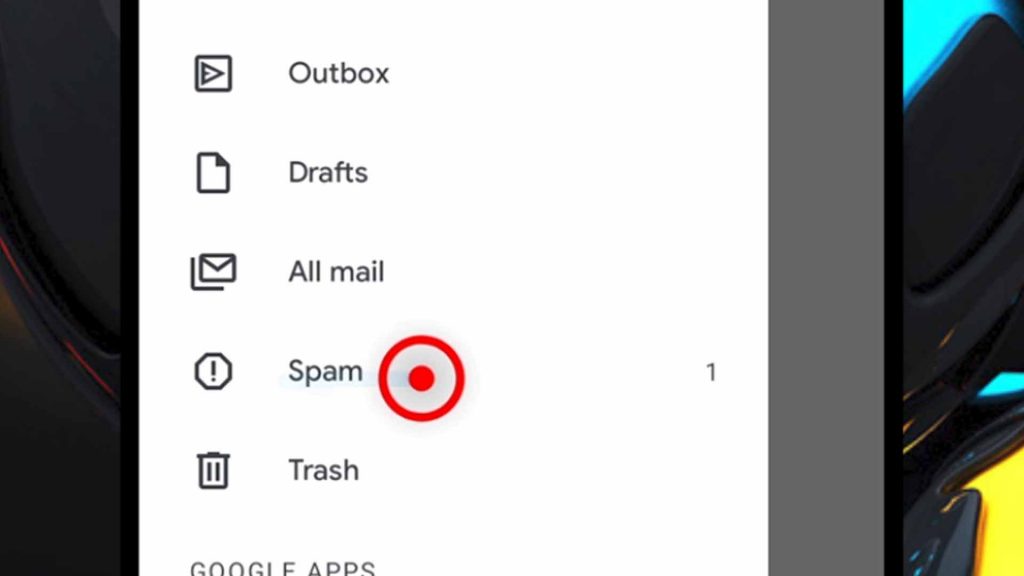
For this tutorial, I sent myself an email from a blocked account. As you can see, it’s in the spam folder.
Open it like you would any email and then tap “Unblock” so you can get notified if you receive an email from that address in the future.


The current email in the spam folder isn’t going to move to your main email list, you’ll have to manually move it back to your inbox.
Just tap the options icon at the top right and then tap Move To.

You’re going to get a list of places to move the email to, if you remember where you blocked it from, move it back there, if you don’t, just tap “Primary”.

When you head back to your emails, you’re going to find it there. Also, future emails from the unblocked address will always have notifications so you can check.
Conclusion
The Gmail app is good for so many things and I will make sure I tell you everything I know about it from time to time.
So always check back for updates on this post.
You should also ask questions on things you want to do with the app and I’ll try to make a video and a detailed post on how you can do it.