Just like you, I’ve had my fair share of the “running out of space” messages constantly popping up on my phone’s notification bar.
Yeah, it gets really annoying when you can’t install more apps or take more pictures on your phone without that reminder coming up.
So, to get rid of that message that’s constantly bothering you, you will have to free up space on your Android phone. And what you’ll need is an app called SD Maid.
If your phone doesn’t allow you install any more apps, then I’ll strongly suggest you uninstall apps you don’t use, but even if you use them, you can still temporarily uninstall them.
This should give you room so you can install SD Maid, and as soon as you’re done freeing up space on your phone, you will be able to install the apps you need.
So, if you’re ready to begin removing all the files and freeing up space on your Android phone, well then let’s begin.
You can watch the video below, but if you want more details, you should keep reading. I know I skipped some things in the video I should have said, but I’m going to say them here.
HOW TO USE SD MAID TO FREE UP SPACE ON YOUR ANDROID PHONE
By now, you should have downloaded and installed SD Maid by clicking the button above. If you haven’t, please do.
Once installed, tap the “open” button.
Note: to view any image in full size, click it, once you’re done, come back to view the rest.

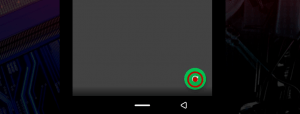
You’ll get a screen with four options, although we’ll be using them, just ignore them for now, and tap the horizontal bars on the top left as indicated by the red circle with a little dot in the middle.

Yeah, it’s hard to miss it.
After tapping the bars, you’ll see a list of options, the first one we’re going to start with is CorpseFinder.

HOW TO DELETE FILES LEFT BY UNINSTALLED APPS ON ANDROID
CorpseFinder is a part of SD Maid that scans your device for all the files and folders left by applications you uninstalled from your device.
Most apps leave some data on your phone after you uninstall them just in case you decide to reinstall them.
With the data files that were previously stored on your phone, the apps will be able to “pick up” from where they left.
If you understand that, then great.
Because if you uninstall apps that have really important things you haven’t backed up, you’re going to permanently lose them.
So, if you know of any app that keeps things on your phone’s internal or external storage, for example apps like downloaders, memo makers, file hiders, etc. make sure you backup those ones before you continue.
But in most cases, you must have forgotten they’re there so it’s safe to get rid of them.
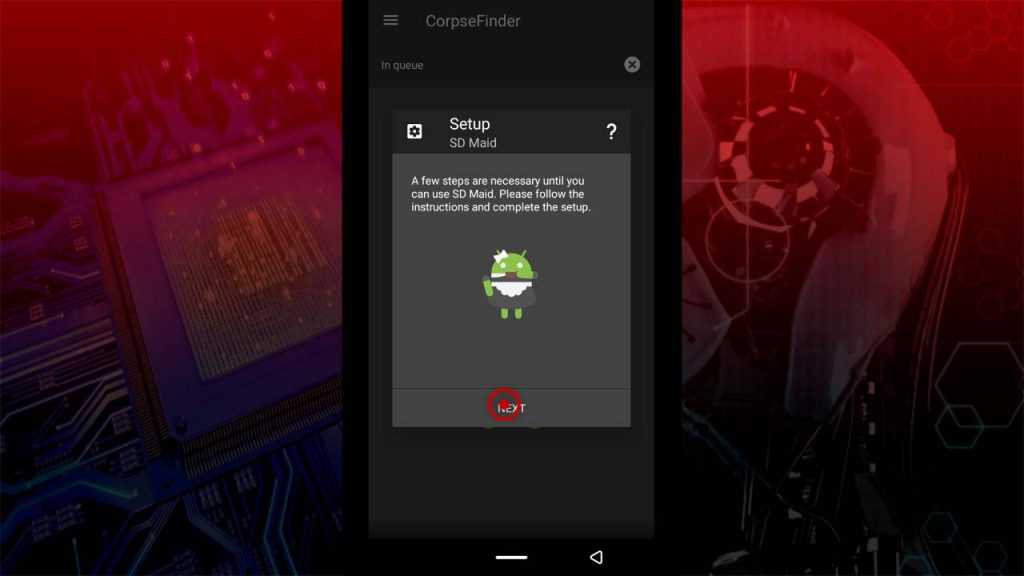
Now, when you tap CorpseFinder, you’re going to be taken to a new screen with some texts that describe what this feature does.
You can read it if you want, when you’re done, tap the green button you see on the bottom right.
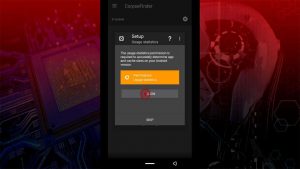
It will ask you for some permissions before the app will be able to start scanning for old files left by the apps you’ve uninstalled.
So, the first thing it will ask for is the permission to read the contents of your internal storage, then your external storage (or SD card, you won’t get this if your phone doesn’t use an SD card) and finally, the usage statistics.
The images below will guide you on how to give SD Maid permission to scan your phone. The next seven images are about giving the app permissions to read your internal storage and your SD card.
As stated, if you don’t have an SD card, you’re only get the internal storage request.
Tap where ever you see the little red circle…it’s hard to miss it.
1 
2 
3 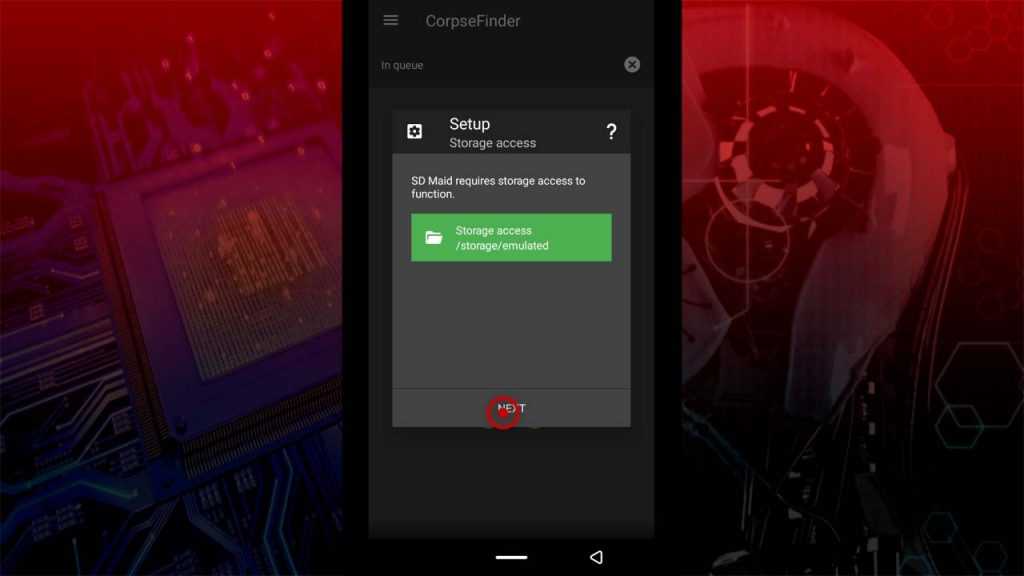
4 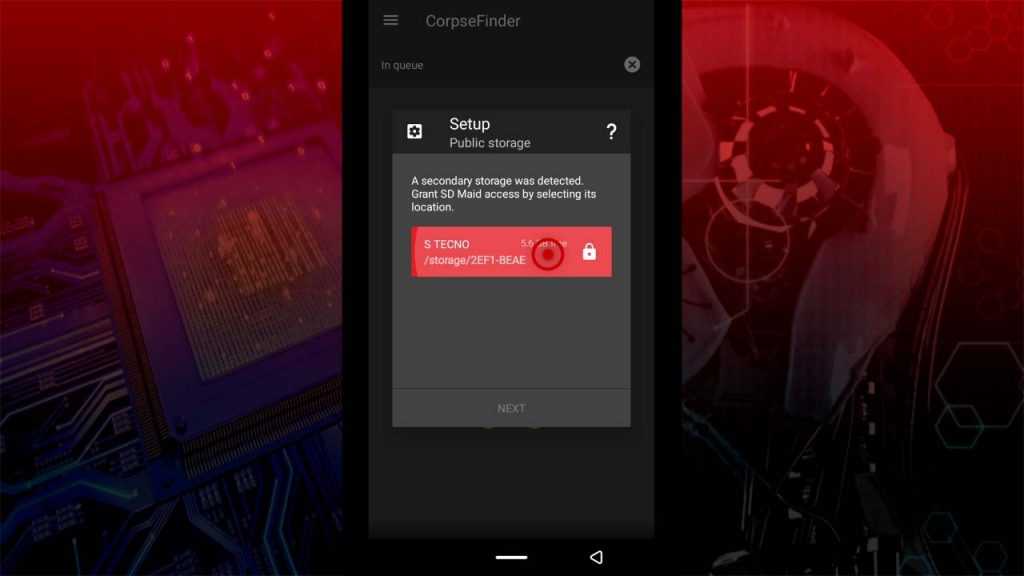
5 
6 
7


The rest of the steps may be a bit confusing so I’ll walk you through them. First of all, tap allow.
A list of applications will be displayed, just look for the SD Maid icon and tap it.

Finally, tap the little button you see on the right.

When it turns green, hit the back button on your phone twice. This will take you to the SD Maid app once again.
Tap done.

After this the app will start scanning your phone for all the files that are just sitting there on your phone and waiting to be used by apps you already uninstalled.
When it’s done scanning, you can look through the files, you may find something useful there. I suggest you go back it up.
If you don’t find any, then just tap the “delete” icon at the top right or bottom left.

A confirmation message will be shown, just tap delete again.

Wait for a while for the app to start deleting, when it’s done, it’s going to show you the amount of space you’ve recovered.

It’s possible that you’ve saved a whole lot of space right now or not. Do let me know in the comments how much you saved by deleting files from the CorpseFinder.
Next we’re going to talk about how to clean SystemFiles.
HOW TO CLEAN SYSTEM FILES ON ANDROID
System files are files that get generated manually by you or automatically by your phone. They include folders, hidden files, files without extensions, temporary files, etc.
Sometimes, you won’t even know the files are there, but with SD Maid, you will be able to free up some space on your phone by clearing unnecessary system files.
Note: as long as your phone is not rooted, this is safe. But if your phone is rooted, be careful so you don’t go deleting files needed by your Android phone.
Well, to clean up system files, tap the horizontal bars again at the top left and this time select SystemCleaner.

When it opens up, again, tap the green button at the bottom right and wait for the app to finish scanning.
For me I was able to get empty folders and temporary files deleted, yours may be more. But whatever you get, just tap the delete icon, confirm that you want to delete and you’ll be on your way.
Next we will be looking at how to check what to delete when your phone storage is full using the storage analyzer.
WHAT YOU SHOULD DELETE WHEN YOUR PHONE STORAGE IS FULL
Sometimes phone storages get quickly filled up by the owners, they put a lot of videos, take a lot of pictures, download movies, etc.
Although the methods above and the ones we’ll be talking about are about getting more space on your phone without deleting anything.
With this method, you may have to delete things you have on your phone. Things like music, pictures, videos, etc.
With that said, let’s continue.
One of the options you’re going to get after tapping the horizontal bars on the top left is Storage Analyzer.

Tap it and scan your storage by tapping the green button at the bottom right.
Now, if your phone has an SD card (like in my case), you will see 2 bars.

If you only have your internal storage, you’ll only see one bar.
Note: if your phone is rooted, you’re going to get an extra bar with “root” as its label.
Depending on what you see, you can either tap on any of the bars or not. From the picture above, you can see that the first bar (which is my internal storage) has the green color on the left.
The green shows the amount of space I have used, while the grey shows the amount of space I have left.
You can probably see that I have used about 24GB out of 55GB, which leaves me with a lot of space.
For some of you, the green part may be more than the grey part, this means you have to go into that storage space and look for large files to delete.
Due to the fact that I don’t have a lot of large files, I’m only going to show you how to use this by deleting my WhatsApp databases.
But for you, it could be deleting large files like videos, movies, etc.
Do ensure you watch the video above to see how to properly use this method.
Once the app is done scanning, tap either the first or second bar (check how green each bar is). Now go through your phone and look for folders that have a lot of green compared to grey.
Unless you know what you’re doing, please don’t delete the “Android” folder or any of its contents.
I’ll suggest you go into folders like “Download”, “DCIM”, “Xender” etc.
For me, I’ll be going into the WhatsApp folder and deleting things there.

From the image above, you can see that the WhatsApp folder only has a little bit of green on the left, this means that the folder doesn’t have a lot of heavy files in it. Nonetheless I’m still going in there to delete.
After opening the WhatsApp folder, I opened the Databases folder, selected what I wanted to delete (by tapping and holding until it turned green) and then tapping the delete icon on the top right.

You can do this for all the files you no longer need on your phone. This is the “manual” method, so it might take you some time.
However, make sure you’re sure you know what you’re deleting before you do.
Now, we’re going to talk about deleting cache files created by applications.
HOW TO DELETE ANDROID CACHE FILES
Cache files are temporary files created by your apps for them to work faster. If you’re constantly using an application, a lot of cache files will be created for the app so the next time you start it, the app doesn’t take time to load.
For example, if you’re always using the Facebook app, the app is going to save many but small sizes of pictures that you see on your feed.
This is to make sure the pictures don’t take too long to load while you’re scrolling. I hope that makes sense.
Now the problem is, the more you keep using the apps, the more the cache files are going to keep growing. Some apps automatically delete cache files after some time but others don’t.
Regardless, it’s still good practice to delete the cache files from time to time.
So to do this, just tap the horizontal bars on the top left.

Then tap AppCleaner.

Now, you will get a “Buy Pro” notification when you try to delete all the cache files after scanning. You can buy the app if you want to or do it the manual way if you don’t want to pay yet.
After scanning, a lot of apps will be shown to you, their cache files will also be shown. Just take note of all the files and go clean them from your phone’s settings.

In the video above, I showed how to clean the cache files for YouTube and Twitter. Here, I’m only going to show you how to do it for YouTube.
In the image above, you can see that YouTube has 149MB of cached files, to clean them without using the SD Maid app, go to Settings > Apps > YouTube.

While on YouTube, tap storage and then tap clear cache.


That is all, you can do the same for the rest of the apps or just buy the pro version and let the app do it for you.
The video above shows how the pro version handles it.
After you’re done with this, the next thing is to delete duplicate files from your phone. The pro version of SD Maid is also needed if you want the app to automatically do it for you.
Manually looking for and deleting duplicate files can be time consuming.
HOW TO DELETE DUPLICATE FILES WITH SD MAID
We all know what duplicate files are, sometimes you can have up to 3 files on your phone that are the same, but in different locations.
Two may be on your internal storage while the other may be on your external storage.
You can delete two of those files leaving one by using SD Maid.
The app is intelligent enough to know the files to delete and the ones to keep. In the video above you will see that happen.
To delete duplicate files, click on the horizontal bars and then tap Duplicates.

Tap the green button at the bottom right to scan and wait for the application to populate the list.
Now, if you plan on removing the duplicate files without paying for the app, it’s going to be a bit difficult or time consuming (if you’re not really good with using your phone or have a lot of duplicate files present).
But if you still want to go that way, then no problem.
After SD Maid is done scanning for duplicate files, it’s going to show you a list, here you can check where each file is located.

From the image above, you can see that the location for the first duplicate file is on my SD card, while the second one is one my internal storage.
All you have to do is remember where each file is located and go delete them until you have only one left.
Example: if you have four duplicates, you need to delete three and keep one. If you have two, you only need to delete one.
This may be a very time consuming activity, but well, if you have time on your hands, you can accomplish it.
CONCLUSION
I think one of the things you should do during this lockdown is to take some time to look through your phone and free up space.
For the files you want to keep, you can transfer them to your computer. Those you don’t need should be deleted.
After following the steps above, you should have a lot of room left on your phone. This way, you can add new apps or download new files on your phone.
I hope you’ve gained a lot by reading this article.
If you’re interested in more Android tips and tricks like this, click here to check out a few I’ve talked about.
Until next time, stay awesome.


